Saturday, October 26, 2013

Rodeo Drive themed hallway

The theme of my school this year is "Setting the Stage for Success" Each grade level was to decorate their hallway like a different street in Hollywood. We got Rodeo Drive! Home of wonderful shopping!
We had the idea to get bags and use them as the backdrop displaying student work in the hallway. 
SO, I went to a local mall and asked stores if they could donate bags to our school for this purpose. Many said no, or were only able to give a few. Some stores said their bags were too expensive themselves to give away. 

 Guess: this store was VERY generous to give me almost 40 bags! 
Cache

Lacoste 

Burberry 

 We had a few parents make us awnings to go over our doors like the awnings on the real Rodeo Drive.  


classroom after first quarter

After a few months of getting everything settled in and FINALLY getting my books from North Carolina storage, my classroom is coming together! I still want to move a few things around to make it more organized, but this is how it looks now. 

My cafe board for Daily 5. You can purchase these cards on my TPT : Daily 5 CAFE board visuals 

Reading nook
I have organized all my books by the Fountas & Pinnell guided reading levels. Each level has its own box. Each book has the level written on it so students know how to put the books back. 

My classroom behavior is 100% classdojo.com ! I have created a reward system that students earn weekly. Through this website parents are able to monitor their child's behavior throughout the day and quickly reinforce it at home. I made specific behaviors for my class that I want them to work on, or strive for. This helps make it specific to what they are doing for their parents to help at home. 

Saw this idea on Pinterest of course! Each student's birthday is on a small clothes pin organized by the month. 

Sunday, September 29, 2013

Salt Dough Maps

This was an extreme task! In previous years my school sent this home for a take home project. This year we decided to create them at school. The kids really enjoyed this, and they learned so much in the process of making them.
We had students make the dough at home and bring it to school to create.


YOU WILL NEED:
1  salt
2 cups of flour
¾ cup of water
 
INSTRUCTIONS:
  1. In a large bowl mix salt and flour together.
  2. Gradually stir in water. Mix well until it forms a doughy consistency. ** it is VERY important not to add too much water!! Gradually add it in, even if you don't use all the water, it is better. If the dough is not the consistency of rollout sugar cookies, it is too wet! add more flour!
Turn the dough and kneed with your hands until smooth and combine.

THe purpose of this project was for students to learn the landforms, regions and locations in the state of Texas. Instead of taking notes, drawing maps and studying maps in the textbook, we create a 3D map that students had to make on their own. 
We started with tracing the state on a piece of cardboard (We made a template from a manilla file folder--about a square foot in size) (the cardboard was brought in by students, varying sizes. The foam poster board works great.  

Students took their salt dough that they made at home and spread it within the traced state on their board. for those that brought dough that was too wet, we cut a hole in the corner of the bag and dispensed the dough like icing.


Students then made mountains and the escarpment lines in the dough. 

If you choose to have the students make the dough at home, bring extra flour to school incase some are too wet. It was nearly impossible and VERY messy for student to make their map if their dough was not the right consistency. After the dough dried for a day or 2, we painted the regions using acrylic paint and foam brushes.


 We painted in the major rivers and the Gulf of Mexico with blue paint. Labels were made to add to the map. Major cities, rivers, landforms and bordering states. Students had to draw the borders of the states around Texas, add a compass rose, and create a key for the colors in their map to correctly label the regions.

Sunday, August 25, 2013

Meet the Teacher night

I was so overwhelmed by the difference of meet the teacher night at my new school. At previous schools I've been in, I get to meet all the parents, but they come in slow increments, and I usually didn't have more than 2 sets of families in my room at one time. 
Well, this year, I probably had EVERYONE in my room at the same time! And then I had my switch class come in to meet me too. These students brought all their school supplies, so the room was filling up of students trying to sort their items. I have been used to students bringing their supplies on the first day of school, this was a change!

 I lined up boxes and put labels on the wall for the things that I was going to collect, like: glue, paper, scissors, pencils, crayons, markers, pens, tissue, sanitizer and ziplocks. 
Students chose their desk by writing their name on it with permanent marker (it comes off with static gaurd spray, or nail polish remover) They left their personal items at their desk (notebooks, binders, pencil boxes, folders)

I set up a computer in the room with my email open. Parents simply typed in their email information into a new contact. This way, I didn't have to take the time to make new contacts on my own, and I also didn't have to go through the process of trying to read the handwriting and get the email correct!

Overall, this year's meet the teacher night was a success. I met most of my students and their parents, and I am looking forward to starting a new school year ;) 

Saturday, August 17, 2013

My new classroom...in progress

I started my career in Atlanta, Georgia as a 3rd grade teacher. My classroom was decorated with hand-me-downs from retired teachers and garage sales--I made it work. 2 years later, my husband got a job promotion and we moved to North Carolina. I taught 3rd grade again for 3 years there. 
THEN, since my husband is so awesome at his job, he was promoted again within his company and we moved to Houston, Texas.
I will be teaching 4th grade Language Arts and Social Studies this year! Starting a new school, new state, new curriculum, new grade and new subject area specialty is already posing to be a challenge, and I don't have my students yet! 
As I began to unpack my school boxes from the move and hang things on the wall, I felt I was getting a lot accomplished. THEN, I walked down the hall and saw all my new coworkers' classrooms. Let's just say, they a;; are awesome, have a theme, and are MUCH more complete than mine. I decided that after 5 years of hand-me-down posters, decorations and supplies that I should make a theme for my room. I went with lime green, blue and a hint of pink. All my favorite colors, and I already had many things these colors anyway :)
This is my guided reading center. I took 2 trapezoid tables and combined them to make my version of a kidney table. On the side wall I will have my CAFE board for the Daily5 (which is all packed with my house belongings)

A view of my teacher corner. 
I framed all my previous classes and hung them on the wall using command strip picture hangers (basically strong velcro). My calendar, schedule, and jobs chart is all located here. 

I bought fabric at Hobby Lobby to go with my theme and made separate bulletin boards on the walls for each subject I teach. 

On my cabinet doors I will display my word wall and student work samples. 

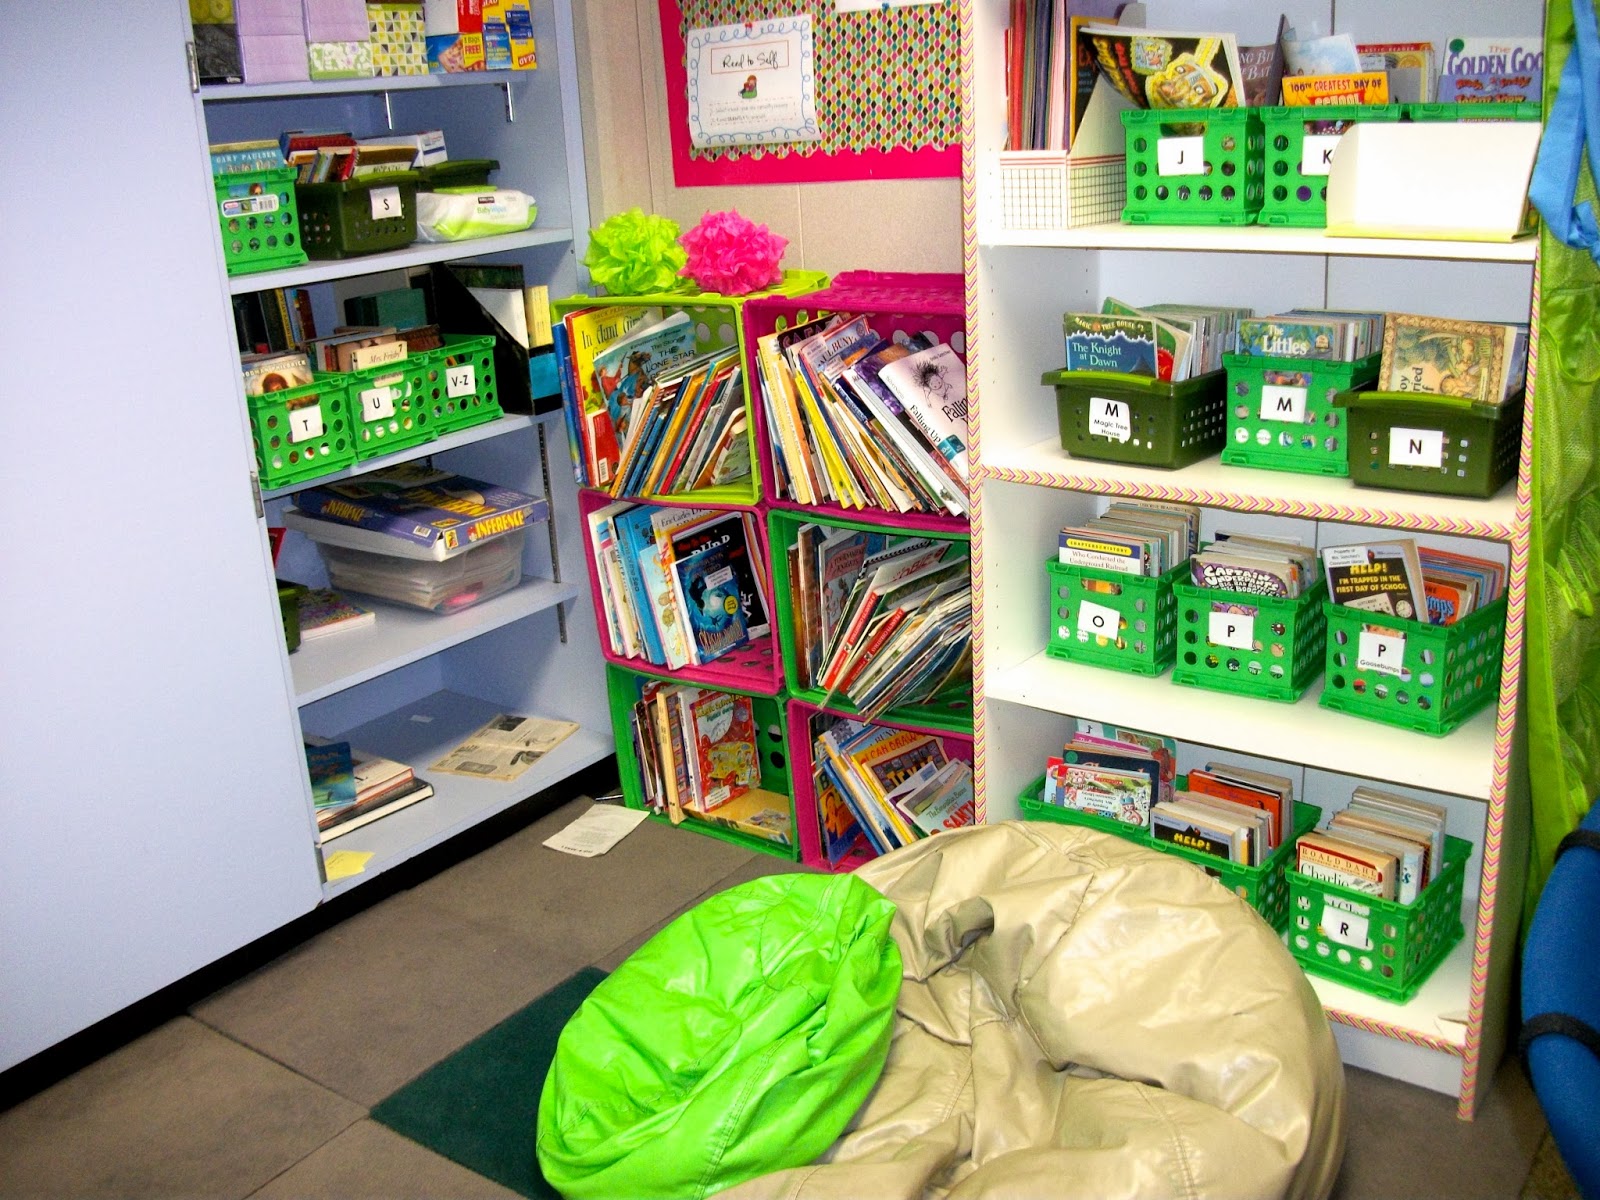
My reading nook. Most of my books are still packed in a storage unit waiting to be shipped here from NC, so it looks quite bare right now. 

NEW Carpet! I have had carpet squares since I went to college and had them in my dorm room. I took them to my classrooms and they were great. 
I suggest carpet squares for the classroom because they are easily moved around and conformed into different shapes. Unlike a standard rug that must stay the shape it came in. 
HOWEVER, after almost a decade of carting these squares around the country they were filthy! I sent them to the land of trash and bought a simple rectangle rug. 
I picked out a few square that were still presentable and put them in my reading nook. 


I saw this idea on pinterest. Last year I taped fake flowers to my pencils to identify them, but they always got destroyed within days. Duct tape is easier to put on, and comes in so many cute colors :)

Grade, Copy, File trays in my teacher area to help organize papers.


Kids were always taking my chair behind the guided reading table. My classroom this year had a bigger chair for the teacher, so I put my mark on it with ribbon. No one can take it now :)

Texas flag in my room! 

I have had this tool box since I started teaching. This year I finally decided to label the drawers. 
I made several text boxes in WORD the same size as the front of the drawer. Then, I put the label on the inside of the drawer with double sided tape. 

My communication station. Here I will put extra handouts, permission slips, book orders, newsletters etc. Hopefully this will eliminate the need to make extra copies of something when a student looses it, and eliminate wasting paper. 


My check in board. I have an entire blog post about this, look for it!